Using Modules and Pinia to structure Nuxt 3 app

Building a Hello World application in Nuxt 3 is relatively simple, but you will most probably reach a stage in your project where you will need to structure your application in order to have easy customizability and extendability for future upgrades and new features. For that you could utilize the concept of Modules.
This article is an inspiration from @davorminchorov. Thanks for suggesting me this topic as I learned quite a few things while writing it :)
Modules
Modules are used to extend Nuxt core functionality. These modules can contain their own components, composables, pages, plugins, and even a server middleware. By having all this modular functionality we can easily bound context of certain business domain (bit like Domain Driven Design that you can read more about in the Bonus Links). Take a look at this infographic for more information regarding how modules are evaluated in Nuxt app. (This is for Nuxt 2 but it works very similar in Nuxt3. Probably, a Nuxt 3 docs about modules will be released soon).
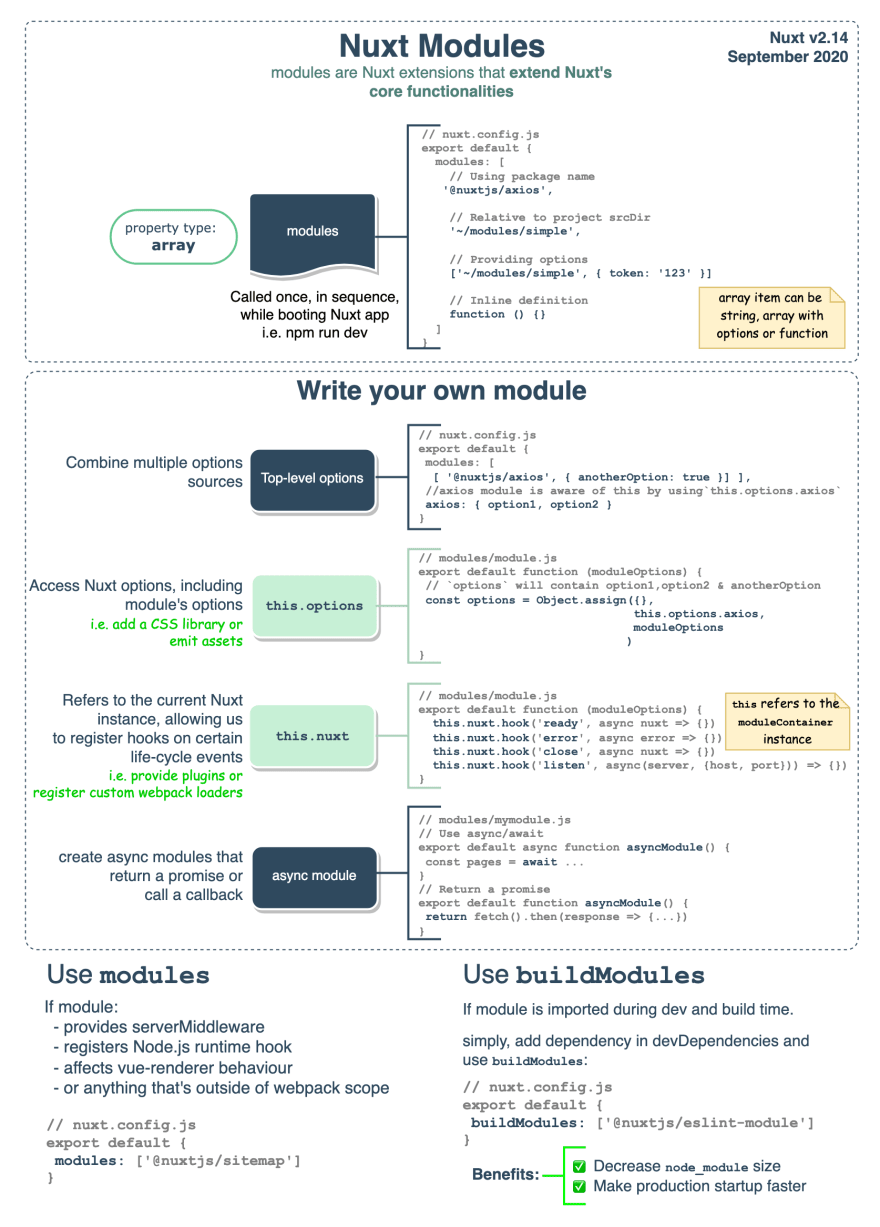
You can read more about modules here
Nuxt 3 example
Now, that we know what the modules are, let's dive in into the code to see how we can utilize them to structure our application.
If you get lost at some point you can check out the Github repository that I have created for this article that contains all the steps covered in this tutorial -> https://github.com/Baroshem/nuxt3-structure-modules-pinia
Setting up a boilerplate Nuxt 3 project
Let's start with generating an empty Nuxt 3 project. We can do so by typing following command in your terminal:
npx nuxi init nuxt3-pinia
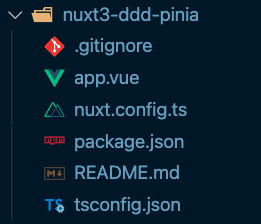
When you open your new created project in your code editor you should see following result:
Now, let's install dependencies of the project:
yarn # npm install
And start the project to see if it is working as expected:
yarn dev # npm run dev
If everything went good, we should see following result in our browser:

Add Pinia
Now, as we have a boilerplate project running let's add a Pinia store to it. If you haven't tried Pinia yet I will highly recommend you to do that.
Pinia is a store library for Vue, it allows you to share a state across components/pages.
As we already know what is Pinia, let's dive into the code and add it to the Nuxt 3 project.
First, let's install @pinia/nuxt and pinia packages
yarn add @pinia/nuxt pinia
Next, add the @pinia/nuxt to the modules section of nuxt.config.ts
// nuxt.config.ts

import { defineNuxtConfig } from 'nuxt'

export default defineNuxtConfig({
  modules: [
    '@pinia/nuxt'
  ]
})
To test, whether Pinia is working as expected, let's create a simple store
// store/test.ts

import { defineStore } from 'pinia'

export const useTest = defineStore({
  id: 'test',

  state: () => ({
    value: 1
  }),

  getters: {
    valueWithName: state => `Value is ${state.value}`
  },

  actions: {
    setNewValue(newValue: number) {
      this.value = newValue
    }
  }
})
Similarly, to how Vuex was used in Vue and Nuxt 2, here we have an initial state, getters, and actions:
-
stateis a reactive state that can be shared across the application and will be modified accordingly when updated globally -
gettersare used to get certain state value (that can also be combined with something else like a text or computed value) -
actionsare used to modify the initial value of state
Now, let's check if our newly created store is registered and if we can access the state value in the app.vue
// app.vue

<template>
  <div>
    {{ test.value }}
    <NuxtWelcome />
  </div>
</template>

<script setup lang="ts">
import { useTest } from "~/store/test";
const test = useTest()
</script>
Check out the browser to see the result.

Great, it works!
New Blog Module
For the sake of this tutorial we will create a simple blog module that will contain it's own components, pages, composables and Pinia store.
But first, let's remove previously create store/test.ts file and remove its declaration from the app.vue as we will not need it anymore. Let's also remove NuxtWelcome component and instead add a NuxtPage component like following:
<template>
  <div>
    <NuxtPage/>
  </div>
</template>
In order for this functionality to work correctly, we have to have a pages directory in our root project (NuxtPage is automatically registered when pages directory is defined).
For this tutorial we won't need any page inside it so we can leave it empty (in the code repository it contains a simple .gitkeep file).
Now, we will move into /blog directory and we will create components, composables, pages, and store.
Components
For this tutorial let' create just a simple Vue 3 component called BlogPost that will accept a blog content and will display it accordingly inside a div
// modules/blog/components/BlogPost.vue

<template>
  <div>
    {{ blog }}
  </div>
</template>

<script setup lang="ts">
const props = defineProps({
  blog: {
    type: String,
    required: true
  }
})
</script>
Composables
To manage state across the application we can use Pinia or composables but for this tutorial I wanted to show that you can use both solutions at the same time or choose the one that suits you best.
// modules/blog/composables/useBlog.ts

import { useState } from "#app"

export const useBlog = () => {
  const blogPostId = useState('blog-post-id', () => 1)

  return {
    blog: `Test blog post ${blogPostId.value}`
  }
}
Store
This is a very similar store that we have created previously to test whether the Pinia works correctly. In this case we have modified the store id and the name to useBlogStore.
// modules/blog/store/stores.ts

import { defineStore } from 'pinia'

export const useBlogStore = defineStore({
  id: 'blog-store',

  state: () => ({
    value: 1
  }),

  getters: {
    valueWithName: state => `Value is ${state.value}`
  },

  actions: {
    setNewValue(newValue: number) {
      this.value = newValue
    }
  }
})
Pages
In this page we will use previously created composable, component, and Pinia store to display this content and value of current blog id from router.
// modules/blog/pages/blog/[id].vue

<template>
  <section>
    <p>Blog post with the id: {{ currentRoute.params.id }}</p>
    <BlogPost :blog="blog"/>
    <span>Current value from blogStore: {{ blogStore.value }}</span>
  </section>
</template>

<script setup lang="ts">
import { useBlog } from '../../composables/useBlog';
import BlogPost from '../../components/BlogPost.vue';
import { useBlogStore } from '../../store/store';

const { currentRoute } = useRouter()
const { blog } = useBlog()
const blogStore = useBlogStore()
</script>
What is happening here is that we are importing:
-
useBlogcomposable and destructuring ablogproperty from it. -
useBlogStorePinia store so that we can have access to the state. -
BlogPostcomponent and we are passing ablogproperty fromuseBlogcomposable directly to it.
By combining these three things we can display in the page /blog/:id a text with current id thanks to router, blog content using composable and component, and value from Pinia store.
Wrapping all into a module
The previous step was already bit difficult so here I will make it as short and simple as possible. To make previous part available in our Nuxt 3 app, let's create a module that will wrap components, composables, pages, and store into one easy to import module.
// modules/blog/module.ts

import { defineNuxtModule } from '@nuxt/kit'
import { resolve, join } from 'pathe'
import type { Nuxt } from '@nuxt/schema'

export default defineNuxtModule({
  name: 'blog-module',
  configKey: 'blog-module',
  setup (options: any, nuxt: Nuxt) {

    // Auto register components
    nuxt.hook('components:dirs', (dirs) => {
      dirs.push({
        path: join(__dirname, 'components')
      })
    })

    // Auto register composables
    nuxt.hook('autoImports:dirs', (dirs) => {
      dirs.push(resolve(__dirname, './composables'))
    })

    // Auto register pages
    nuxt.hook('pages:extend', (pages) => {
      pages.push({
        name: 'blog-page',
        path: '/blog/:id',
        file: resolve(__dirname, './pages/blog/[id].vue')
      })
    })

    // Pinia store modules are auto imported
  }
})
Let's discuss it step by step:
- We are defining a new Nuxt module.
- We are giving it a name of
blog-modulefor easier recognition and distinction. - We are giving it a config key (in our case the same as the name) that can be used to pass some options from
nuxt.config.tsdirectly to the module. - In the setup function we are defining what should happen on module registration.
- In our case, we want to automatically register components, composables, pages, and stores so that we can use the across the application
The last step now, is to add our newly created module to the modules section of nuxt.config.ts:
// nuxt.config.ts

import { defineNuxtConfig } from 'nuxt'

// https://v3.nuxtjs.org/docs/directory-structure/nuxt.config
export default defineNuxtConfig({
  modules: [
    '@pinia/nuxt',
    '~/modules/blog/module'
  ]
})
We are adding it to the modules so that all things like components or composables are auto imported.
And that's it! We now have a module that is containing all the functionality related to the blog.
Summary
You have managed to create a blog module that contains it's own components, composables, pages, and stores. Well done! There was a lot of knowledge to cover here and it should be a solid start that will enable you to structure your next (Nuxt ;)) project more easily. Make sure to experiment with this approach as there might be more interesting functionalities that could be encapsulated like that :)
Bonus
- https://github.com/areindl/nuxt-structure-with-modules
- https://news.knowledia.com/US/en/articles/domain-driven-design-in-nuxt-apps-76ec743ff77b2bb66fd925d77acdb6f283c6c50c
- https://bestofvue.com/repo/Typers-me-Nuxt2-DDD-vuejs-scaffold
- https://www.youtube.com/watch?v=lwXbBlx01a4
- https://vueschool.io/articles/vuejs-tutorials/domain-driven-design-in-nuxt-apps/#:~:text=Domain%2DDriven%20Design%20(DDD),categorized%20parts%20of%20the%20problem).