Setup load balancer for Cloud Run 🌐
In this article, I explain how to add load balancer to a Cloud Run service. The steps are complicated so I took screenshots for you guys.
Prerequisite
Please create a Cloud Run service to apply restriction.
Create a load balancer
Let's create a HTTPS load balancer. Go to Load balancing setting in Network services. Click CREATE LOAD BALANCER.
In the next page, you should select the type of your load balancer. Select HTTP(S) Load Balancer.
In the creation setting, let it keep as it is.
In the New Classic HTTP(S) load balancer page, you should setup the backend to catch traffic (Cloud Run), traffic routings and allowed protocols of traffics.
First, let's setup the backend. Click the drop down menu Backend service & backend buckets and CREATE A BACKEND SERVICE. You should not see any backend service if you haven't create any (my screenshot has one though).
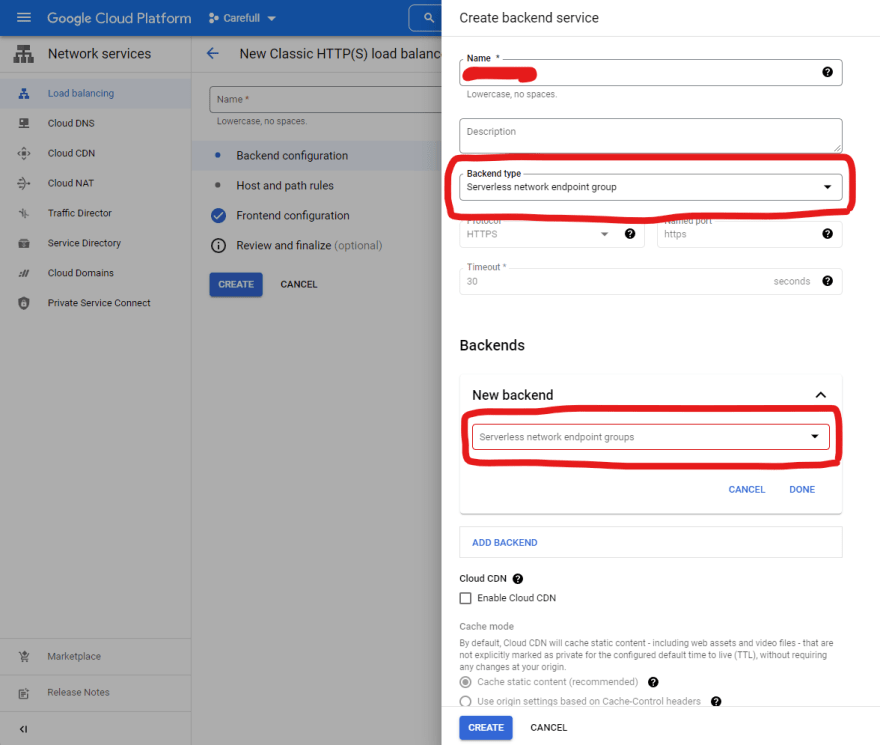
First you should name it like cloud-run-backend, select Server less network endpoint group as the Backend type. Then click the drop down in the New backend section.
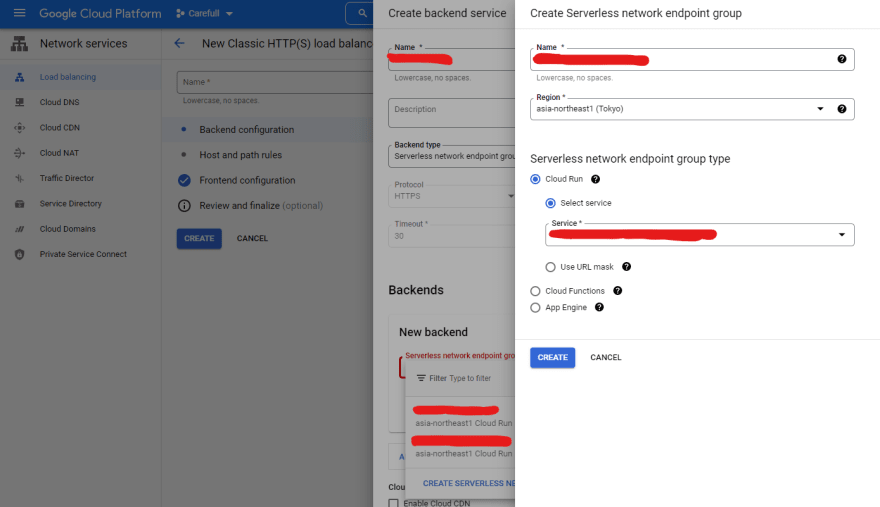
Name the endpoint group like cloud-run-endpoint-group, select your region and select Cloud Run and your Cloud Run service which you want to connect the load balancer to. Click CREATE.

Next, let's setup Frontend. You do not have to setup Host and path rules if you want to route all traffic to your Cloud Run.
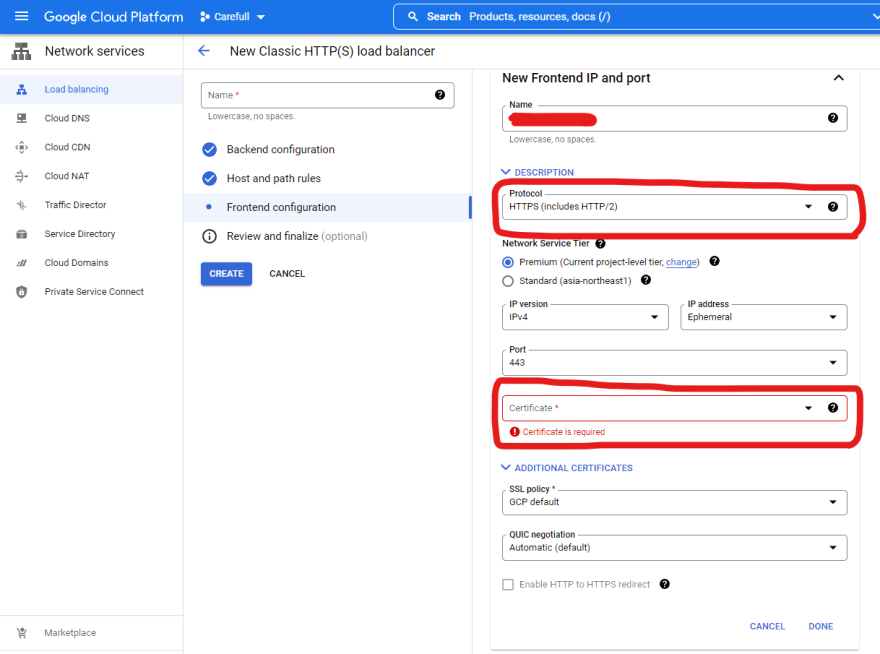
Give a name to your new frontend, select HTTPS as the protocol and click the Certificate drop down menu. (It can be HTTP but I do not recommend)
Please create a certificate for HTTPS traffic. Name it, select Create Google-managed certificate and input you domain you want to use.

Domain setting
You're almost done. Go to the Load balancing page and find your IP.
Create A record with the IP address on your DNS setting (e.g. Google Domains, Go Daddy etc).
Notes
The setting takes time to fully propagate to the system (e.g. 5 - 10 min). Please be patient 😝
Finished! This article helps you 🥰


