FullStack - How to create a working blogging website with pure HTML, CSS and JS in 2021.
Hello, Today we'll see, how we can easily create a blogging website using HTML, CSS and JS only. No other library. We'll also use Firebase firestore to store/retrieve blog data.
This is a very good project to practice full-stack development. When I started with web development I always thought how can I make my own blogging website. And today, I am proud that I tried to make blogging site. Our website is very simple and has features like
- Dynamic Blog pages.
- Have a dedicated editor for blogs.
- You can add/make as many blogs you want.
- You can add Headings, paragraphs, and Images to the blog post.
- Have read more blogs section also.
To see demo or you want full coding tutorial video. You can watch the tutorial below.
Video Tutorial
I appreciate if you can support me by subscribing my youtube channel.
So, without wasting more time let's see how to code this.
Code
As this is a node.js web app. We need NPM and Node.js in order to start with, so make sure you have them installed in your system.
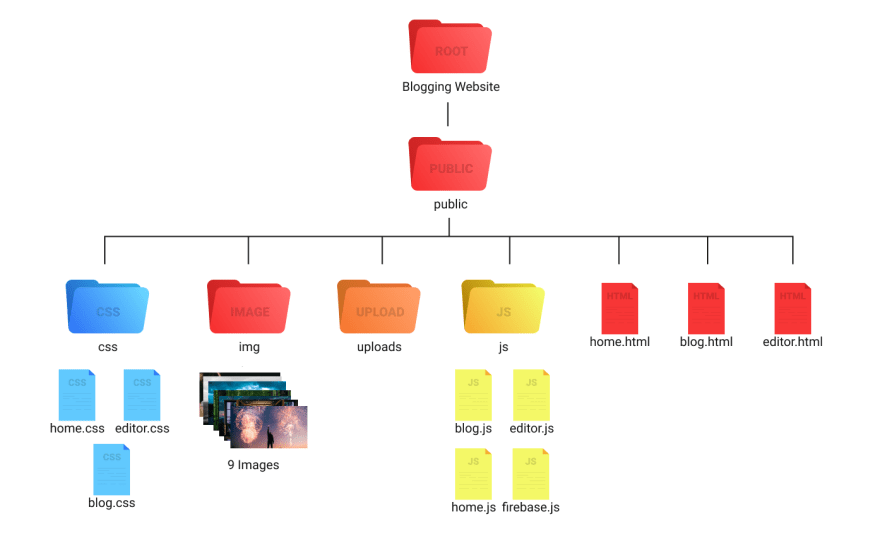
So let's start with its folder structure.
Folder Structure.
This is our folder structure.
So let's make our server.
Server
Open the project file (root directory) in your code editor. Open Terminal and run
npm init
This will initialize NPM to our project. After that install some packages by this.
npm i express.js express-fileupload nodemon
-express.js - is to create a server
-express-fileupload - is to handle uploads
-nodemon - is to run server continuously
once package installed. You should see a package.json file inside your root directory. Open it.
And change it scripts to
"scripts": {
    "start":"nodemon server.js"
}
Now we are ready to create a server. Create a new file inside your root directory name it server.js. And open it.
First import all packages that we need.
const express = require('express');
const path = require('path');
const fileupload = require('express-fileupload');
And then store your public folder path inside a variable.
let initial_path = path.join(__dirname, "public");
After that create expressJS server. And set public folder path to static path. Also use app.use(fileupload()) to enable file uploads.
const app = express();
app.use(express.static(initial_path));
app.use(fileupload());
After this make a home route and in response send home.html file. And run your server on 3000 port.
app.get('/', (req, res) => {
    res.sendFile(path.join(initial_path, "home.html"));
})

app.listen("3000", () => {
    console.log('listening......');
})
Run your server by npm start. And our server is done for now. Let's create homepage now.
Homepage
Write basic HTML structure and link home.css file. Then start by creating a navbar.
Home.html
<!DOCTYPE html>
<html lang="en">
<head>
    <meta charset="UTF-8">
    <meta http-equiv="X-UA-Compatible" content="IE=edge">
    <meta name="viewport" content="width=device-width, initial-scale=1.0">
    <title>Blog : Homepage</title>

    <link href="https://fonts.googleapis.com/css2?family=Poppins:ital,wght@0,400;0,500;0,600;1,600&display=swap" rel="stylesheet">
    <link rel="stylesheet" href="css/home.css">

</head>
<body>

    <nav class="navbar">
        <img src="img/logo.png" class="logo" alt="">
        <ul class="links-container">
            <li class="link-item"><a href="/" class="link">home</a></li>
            <li class="link-item"><a href="/editor" class="link">editor</a></li>
        </ul>
    </nav>

</body>
</html>
Home.css
*{
    margin: 0;
    padding: 0;
    box-sizing: border-box;
}

body{
    width: 100%;
    position: relative;
    font-family: 'poppins', sans-serif;
}

::selection{
    background: #1b1b1b;
    color: #fff;
}

.navbar{
    width: 100%;
    height: 60px;
    position: fixed;
    top: 0;
    left: 0;
    display: flex;
    justify-content: space-between;
    align-items: center;
    padding: 0 5vw;
    background: #fff;
    z-index: 9;
}

.links-container{
    display: flex;
    list-style: none;
}

.link{
    padding: 10px;
    margin-left: 10px;
    text-decoration: none;
    text-transform: capitalize;
    color: #000;
}
Output
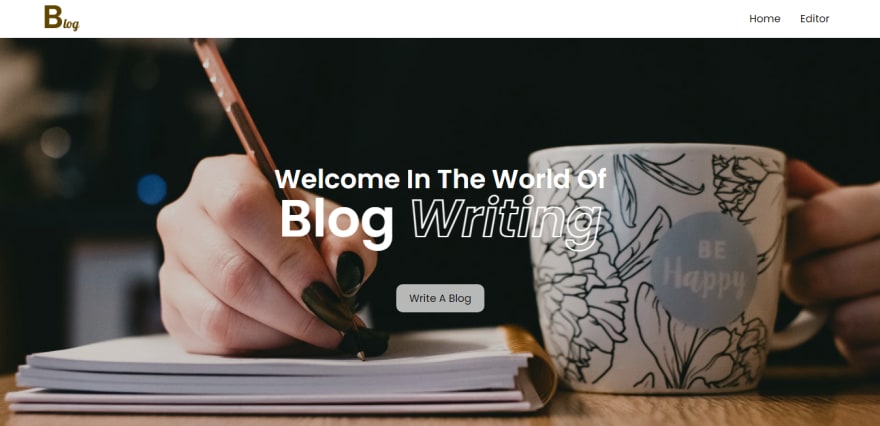
Now create the header.
<header class="header">
    <div class="content">
        <h1 class="heading">
            <span class="small">welcome in the world of</span>
            blog
            <span class="no-fill">writing</span>
        </h1>
        <a href="/editor" class="btn">write a blog</a>
    </div>
</header>
.header{
    margin-top: 60px;
    width: 100%;
    height: calc(100vh - 60px);
    background: url(../img/header.png);
    background-size: cover;
    display: flex;
    justify-content: center;
    align-items: center;
}

.content{
    text-align: center;
}

.heading{
    color: #fff;
    text-transform: capitalize;
    font-size: 80px;
    line-height: 60px;
    margin-bottom: 80px;
}

.heading .small{
    display: block;
    font-size: 40px;
}

.heading .no-fill{
    font-style: italic;
    color: transparent;
    -webkit-text-stroke: 2px #fff;
}

.btn{
    padding: 10px 20px;
    border-radius: 10px;
    background: rgba(255, 255, 255, 0.7);
    color: #000;
    text-decoration: none;
    text-transform: capitalize;
}
Output
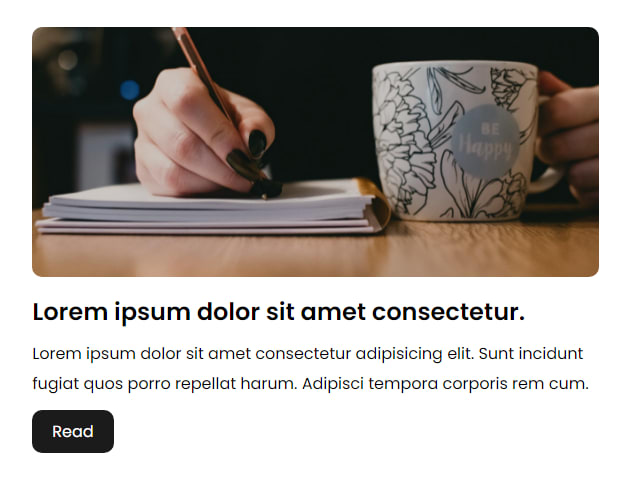
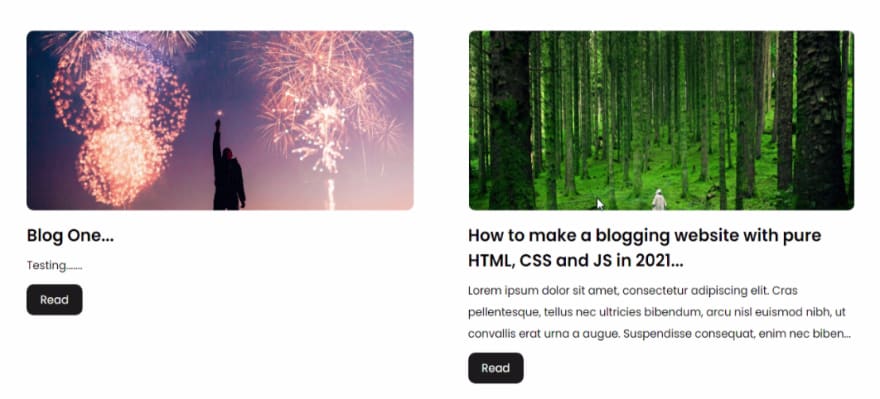
Now the last element for our homepage. Make blog card section and make one card, as we make these cards with JS later.
<section class="blogs-section">
    <div class="blog-card">
        <img src="img/header.png" class="blog-image" alt="">
        <h1 class="blog-title">Lorem ipsum dolor sit amet consectetur.</h1>
        <p class="blog-overview">Lorem ipsum dolor sit amet consectetur adipisicing elit. Sunt incidunt fugiat quos porro repellat harum. Adipisci tempora corporis rem cum.</p>
        <a href="/" class="btn dark">read</a>
    </div>
</section>
.blogs-section{
    width: 100%;
    padding: 50px 5vw;
    display: grid;
    grid-template-columns: repeat(2, 1fr);
    grid-gap: 80px;
}

.blog-image{
    width: 100%;
    height: 250px;
    object-fit: cover;
    border-radius: 10px;
    margin-bottom: 10px;
}

.blog-overview{
    margin: 10px 0 20px;
    line-height: 30px;
}

.btn.dark{
    background: #1b1b1b;
    color: #fff;
}
Output
Now, you can comment the blog-card element. Our homepage is done. Go inside server and make /editor route.
Server.js
app.get('/editor', (req, res) => {
    res.sendFile(path.join(initial_path, "editor.html"));
})
After this let's make our editor.
Editor.
In editor.html link both home.css and editor.css files. And inside body tag start by making banner div.
<div class="banner">
    <input type="file" accept="image/*" id="banner-upload" hidden>
    <label for="banner-upload" class="banner-upload-btn"><img src="img/upload.png" alt="upload banner"></label>
</div>
.banner{
    width: 100%;
    height: 400px;
    position: relative;
    background: #e7e7e7;
    background-size: cover;
    background-position: center;
}

.banner-upload-btn{
    position: absolute;
    bottom: 20px;
    right: 20px;
    width: 40px;
    height: 40px;
    border-radius: 50%;
    background: rgba(0, 0, 0, 0.1);
    display: flex;
    justify-content: center;
    align-items: center;
    cursor: pointer;
}

.banner-upload-btn img{
    width: 20px;
}
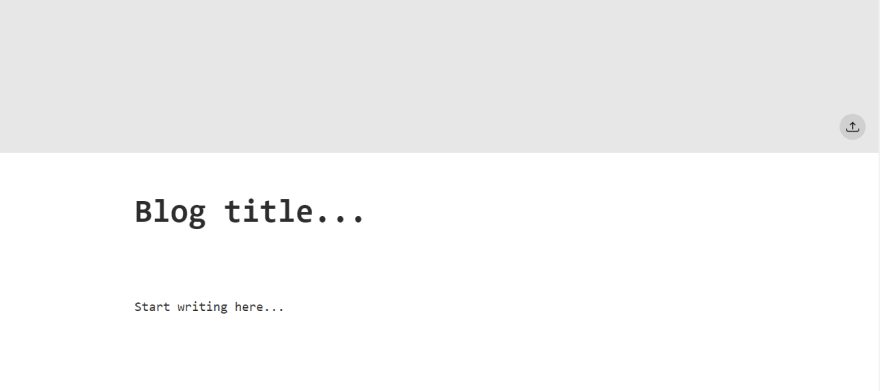
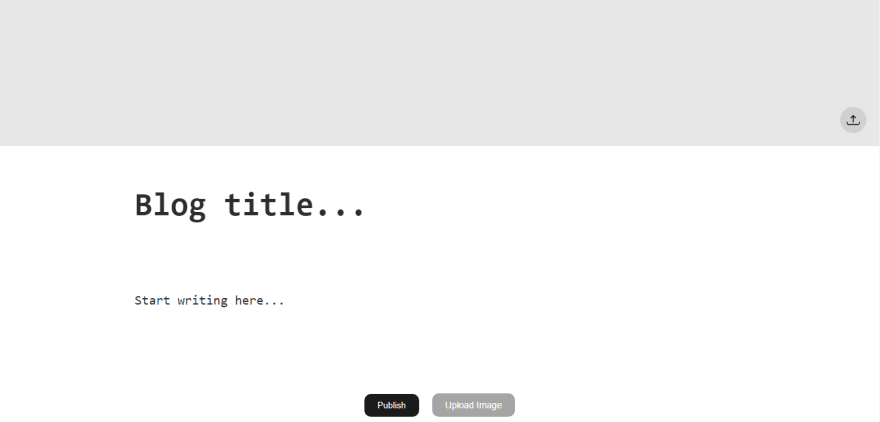
Output
And then make text fields for blog title, article.
<div class="blog">
    <textarea type="text" class="title" placeholder="Blog title..."></textarea>
    <textarea type="text" class="article" placeholder="Start writing here..."></textarea>
</div>
.blog{
    width: 70vw;
    min-width: 400px;
    height: 100px;
    display: block;
    margin: auto;
    padding: 50px 0;
}

textarea::-webkit-scrollbar{
    width: 10px;
}

textarea::-webkit-scrollbar-thumb{
    background: rgba(0, 0, 0, 0.1);
    border-radius: 10px;
}

.title,
.article{
    width: 100%;
    min-height: 100px;
    height: auto;
    outline: none;
    font-size: 50px;
    font-weight: 600;
    color: #2d2d2d;
    resize: none;
    border: none;
    padding: 10px;
    border-radius: 10px;
}

.title::placeholder,
.article::placeholder{
    color: #2d2d2d;
}

.article{
    height: 500px;
    font-size: 20px;
    margin-top: 20px;
    line-height: 30px;
    font-weight: 500;
    padding-bottom: 100px;
    white-space: pre-wrap;
}
Output
And at last, make publish button with upload image button also.
<div class="blog-options">
    <button class="btn dark publish-btn">publish</button>
    <input type="file" accept="image/*" id="image-upload" hidden>
    <label for="image-upload" class="btn grey upload-btn">Upload Image</label>
</div>
.blog-options{
    position: fixed;
    bottom: 0;
    left: 0;
    width: 100%;
    height: 60px;
    background: #fff;
    z-index: 9;
    display: flex;
    justify-content: center;
    align-items: center;
}

.btn{
    border: none;
    outline: none;
    cursor: pointer;
}

.btn.grey{
    background: #a5a5a5;
    color: #fff;
    margin-left: 20px;
    font-size: 14px;
}
Output
We are done styling our editor. Now let's make it functional. Link editor.js to HTML file. And open it.
Start by selecting all elements that we need.
const blogTitleField = document.querySelector('.title');
const articleFeild = document.querySelector('.article');

// banner
const bannerImage = document.querySelector('#banner-upload');
const banner = document.querySelector(".banner");
let bannerPath;

const publishBtn = document.querySelector('.publish-btn');
const uploadInput = document.querySelector('#image-upload');
After selecting all elements. Add change event to our upload inputs and process the upload.
bannerImage.addEventListener('change', () => {
    uploadImage(bannerImage, "banner");
})

uploadInput.addEventListener('change', () => {
    uploadImage(uploadInput, "image");
})
Now create uploadImage function.
const uploadImage = (uploadFile, uploadType) => {
    const [file] = uploadFile.files;
    if(file && file.type.includes("image")){
        const formdata = new FormData();
        formdata.append('image', file);

        fetch('/upload', {
            method: 'post',
            body: formdata
        }).then(res => res.json())
        .then(data => {
            if(uploadType == "image"){
                addImage(data, file.name);
            } else{
                bannerPath = `${location.origin}/${data}`;
                banner.style.backgroundImage = `url("${bannerPath}")`;
            }
        })
    } else{
        alert("upload Image only");
    }
}
So this is how we can make our upload work. But it'll not work now because we haven't made our /upload route. For that open server.js and make /upload route.
Server.js
app.post('/upload', (req, res) => {
    let file = req.files.image;
    let date = new Date();
    // image name
    let imagename = date.getDate() + date.getTime() + file.name;
    // image upload path
    let path = 'public/uploads/' + imagename;

    // create upload
    file.mv(path, (err, result) => {
        if(err){
            throw err;
        } else{
            // our image upload path
            res.json(`uploads/${imagename}`)
        }
    })
})
By this we are done. You can check your upload is working or not. As you might notice that we are calling addImage() but we haven't make that yet. So let's make it.
editor.js
const addImage = (imagepath, alt) => {
let curPos = articleFeild.selectionStart;
let textToInsert = `\r\r`;
articleFeild.value = articleFeild.value.slice(0, curPos) + textToInsert + articleFeild.value.slice(curPos);
}
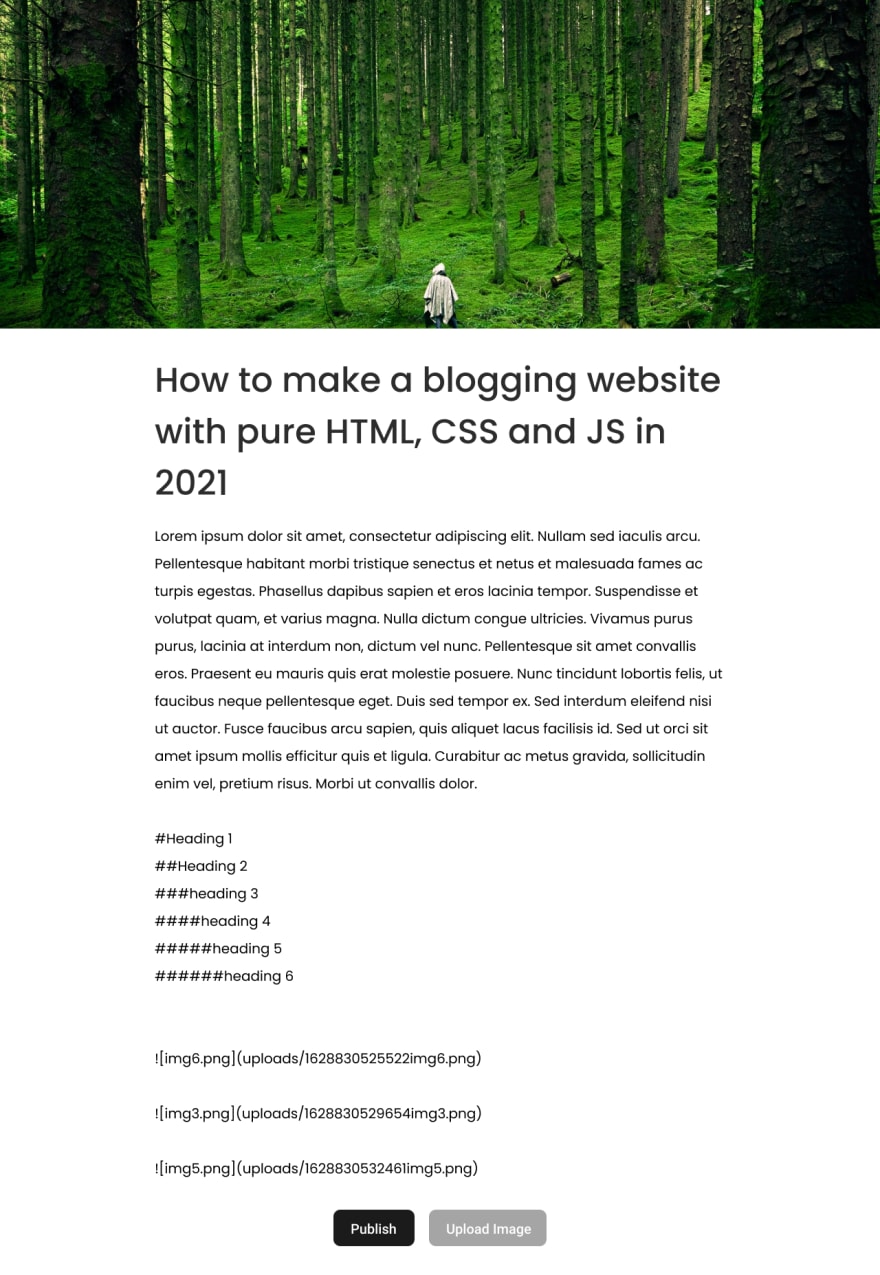
This function will let you insert a text format of your image for example if I upload 1.png then this function insert something like this  inside our article field.
So up until now we have done with our uploads also. Now, go to your firebase and create a blogging project. And setup you firebase. You can refer this video for the setup.
After setting up firebase variables in firebase.js link that file inside editor.html above editor.js like this.
<script src="https://www.gstatic.com/firebasejs/8.9.1/firebase-app.js"></script>
<script src="https://www.gstatic.com/firebasejs/8.9.1/firebase-firestore.js"></script>

<script src="js/firebase.js"></script>
<script src="js/editor.js"></script>
Then again go inside editor.js. And make publish button functional.
let months = ["Jan", "Feb", "Mar", "Apr", "May", "Jun", "Jul", "Aug", "Sep", "Oct", "Nov", "Dec"];

publishBtn.addEventListener('click', () => {
    if(articleFeild.value.length && blogTitleField.value.length){
        // generating id
        let letters = 'abcdefghijklmnopqrstuvwxyz';
        let blogTitle = blogTitleField.value.split(" ").join("-");
        let id = '';
        for(let i = 0; i < 4; i++){
            id += letters[Math.floor(Math.random() * letters.length)];
        }

        // setting up docName
        let docName = `${blogTitle}-${id}`;
        let date = new Date(); // for published at info

        //access firstore with db variable;
        db.collection("blogs").doc(docName).set({
            title: blogTitleField.value,
            article: articleFeild.value,
            bannerImage: bannerPath,
            publishedAt: `${date.getDate()} ${months[date.getMonth()]} ${date.getFullYear()}`
        })
        .then(() => {
            location.href = `/${docName}`;
        })
        .catch((err) => {
            console.error(err);
        })
    }
})
This is the way we create a document inside firebase firestore. After this our editor is fully working. If you test it you will see you are being re-directed to blog route. But we haven't make that route. For that open server.js last time. And make blog route and also 404 route.
server.js
app.get("/:blog", (req, res) => {
    res.sendFile(path.join(initial_path, "blog.html"));
})

app.use((req, res) => {
    res.json("404");
})
Now, you should see blog.html file. So the last time let's first make blog page. this time link all 3 CSS files to blog.html and copy the navbar from home.html to this page.
<div class="banner"></div>

<div class="blog">
    <h1 class="title"></h1>
    <p class="published"><span>published at - </span></p>
    <div class="article">

    </div>
</div>
.blog, .article{
    position: relative;
    height: fit-content;
    padding-bottom: 0;
}

.article, .title{
    min-height: auto;
    height: fit-content;
    padding: 0 10px;
    white-space: normal;
}

.published{
    margin: 20px 0 60px;
    padding: 0 10px;
    text-transform: capitalize;
    font-style: italic;
    color: rgba(0, 0, 0, 0.5);
}

.published span{
    font-weight: 700;
    font-style: normal;
}

.article *{
    margin: 30px 0;
    color: #2d2d2d;
}

.article-image{
    max-width: 100%;
    max-height: 400px;
    display: block;
    margin: 30px auto;
    object-fit: contain;
}
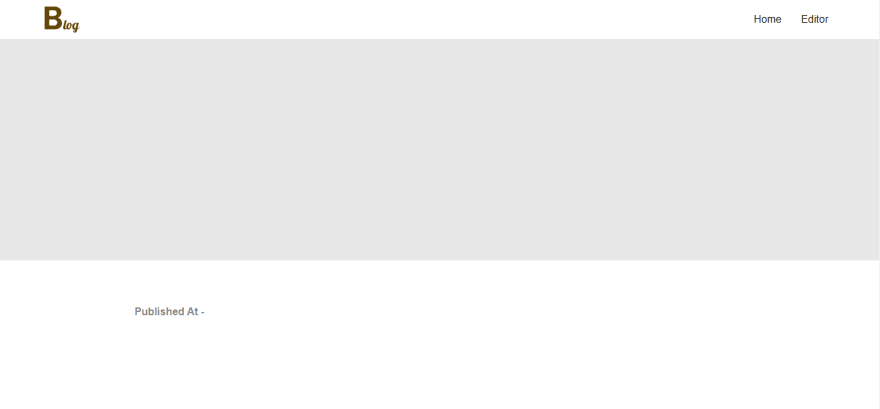
Output
This page have all the elements structure. We will give its content dynamically with JS.
Link firebase scripts, firebase.js and blog.js to it. And open blog.js
Start by extracting the blog id from the URL. and fetch data from firestore
let blogId = decodeURI(location.pathname.split("/").pop());

let docRef = db.collection("blogs").doc(blogId);

docRef.get().then((doc) => {
    if(doc.exists){
        setupBlog(doc.data());
    } else{
        location.replace("/");
    }
})
Once we got the the blog data. Make setupBlog().
const setupBlog = (data) => {
    const banner = document.querySelector('.banner');
    const blogTitle = document.querySelector('.title');
    const titleTag = document.querySelector('title');
    const publish = document.querySelector('.published');

    banner.style.backgroundImage = `url(${data.bannerImage})`;

    titleTag.innerHTML += blogTitle.innerHTML = data.title;
    publish.innerHTML += data.publishedAt;

    const article = document.querySelector('.article');
    addArticle(article, data.article);
}
In above function we selected all the elements we need and set their content.
And at last. We are calling addArticle function because we need to format our article.
Make addArticle function and format the article text we got from the firstore.
const addArticle = (ele, data) => {
    data = data.split("\n").filter(item => item.length);
    // console.log(data);

    data.forEach(item => {
        // check for heading
        if(item[0] == '#'){
            let hCount = 0;
            let i = 0;
            while(item[i] == '#'){
                hCount++;
                i++;
            }
            let tag = `h${hCount}`;
            ele.innerHTML += `<${tag}>${item.slice(hCount, item.length)}</${tag}>`
        }
        //checking for image format
        else if(item[0] == "!" && item[1] == "["){
            let seperator;

            for(let i = 0; i <= item.length; i++){
                if(item[i] == "]" && item[i + 1] == "(" && item[item.length - 1] == ")"){
                    seperator = i;
                }
            }

            let alt = item.slice(2, seperator);
            let src = item.slice(seperator + 2, item.length - 1);
            ele.innerHTML += `
            <img src="${src}" alt="${alt}" class="article-image">
            `;
        }

        else{
            ele.innerHTML += `<p>${item}</p>`;
        }
    })
}
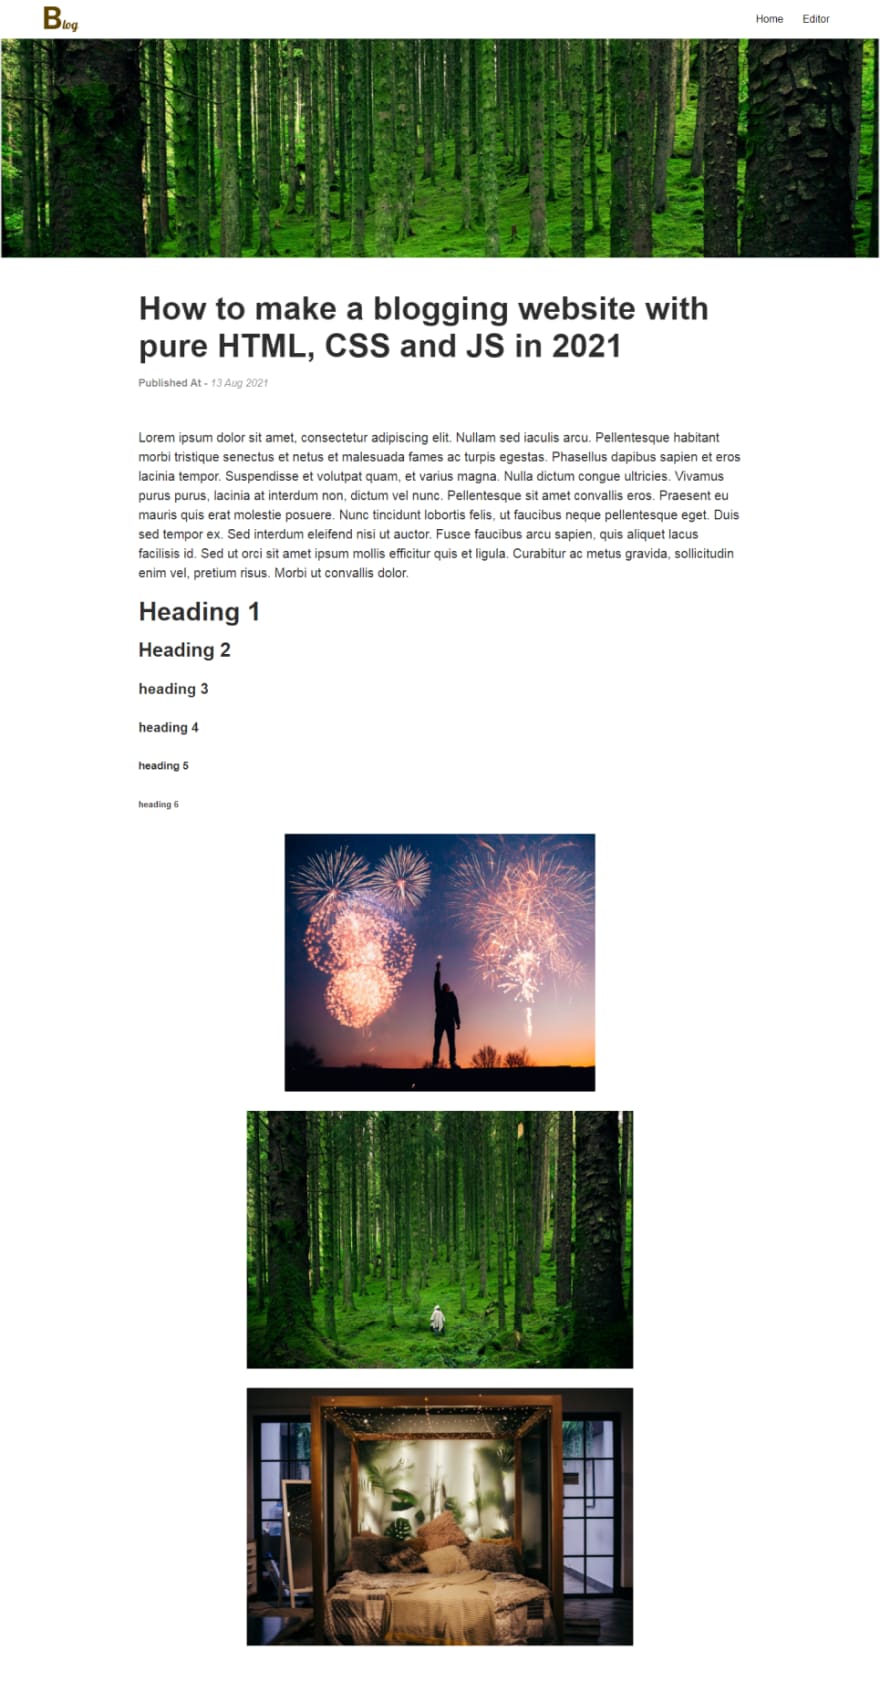
After this let's compare what we enter in our editor and what we'll see in our blog.
editor
blog
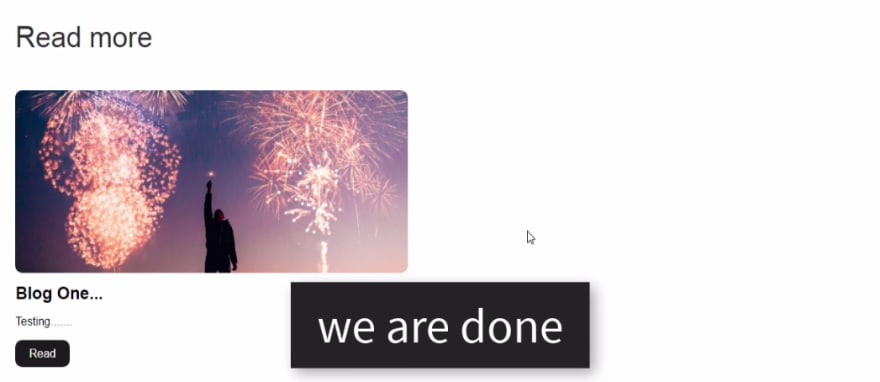
So our blog is also done. Now we want a recommendation or read more element in our blog page.
So open blog.html and make one.
<h1 class="sub-heading">Read more</h1>
.sub-heading{
    padding: 0 5vw;
    color: #2d2d2d;
    font-weight: 500;
    font-size: 40px;
    margin-top: 80px;
}
After this, copy the blog-section element from home.html to blog.html
<section class="blogs-section">
    <!-- <div class="blog-card">
        <img src="img/header.png" class="blog-image" alt="">
        <h1 class="blog-title">Lorem ipsum dolor sit amet consectetur.</h1>
        <p class="blog-overview">Lorem ipsum dolor sit amet consectetur adipisicing elit. Sunt incidunt fugiat quos porro repellat harum. Adipisci tempora corporis rem cum.</p>
        <a href="/" class="btn dark">read</a>
    </div> -->
</section>
And as you can see we are using same elements for read more and blogs. So we will use same JavaScript function to make both these elements. So for that link home.js file to blog.html above blog.js.
And then last thing open home.js and code this.
const blogSection = document.querySelector('.blogs-section');

db.collection("blogs").get().then((blogs) => {
    blogs.forEach(blog => {
        if(blog.id != decodeURI(location.pathname.split("/").pop())){
            createBlog(blog);
        }
    })
})

const createBlog = (blog) => {
    let data = blog.data();
    blogSection.innerHTML += `
    <div class="blog-card">
        <img src="${data.bannerImage}" class="blog-image" alt="">
        <h1 class="blog-title">${data.title.substring(0, 100) + '...'}</h1>
        <p class="blog-overview">${data.article.substring(0, 200) + '...'}</p>
        <a href="/${blog.id}" class="btn dark">read</a>
    </div>
    `;
}
That how we do our blogs cards. We are done.
Outupt - Home.html
Output - Blog.html
So, that's it. I hope you understood each and everything. If you have doubt or I missed something let me know in the comments.
Articles you may find Useful
- Infinte CSS loader
- Best CSS Effect
- Wave Button Hover Effect
- Youtube API - Youtube Clone
- TMDB - Netflix Clone
I really appreciate if you can subscribe my youtube channel. I create awesome web contents.
Thanks For reading.
